Author pachakutek Date Wed Mar 03, 2010 1:45 am Type KB Fix
Keywords
I needed to replace my forks seals today, and was surprised to find all sorts of different advice here. The reason is that even though our bikes share a lot things thru out the years, the forks are the one thing that has changed a lot from a year to other. For example there are forks that air assisted, some that have bleeders others not, some that "need" special tools while other not... etc.
So this guide is not meant to be definitive with all models, but to give you a close idea on what to do on yours. This was done on a 1995 XV750.
Do it at your own risk, and aware that this is not a formal shop manual... so if you don't feel comfortable following along, please don't :)
Tools
You will need:
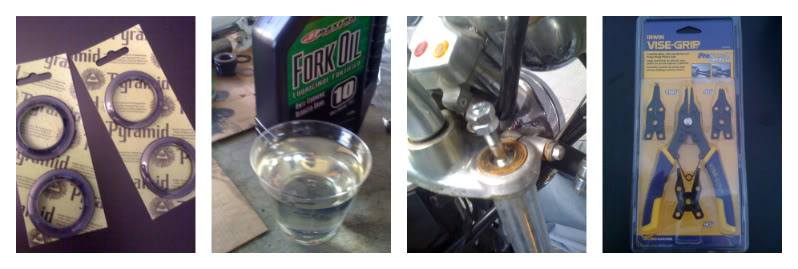
- Fork seals and Dust Seals ($25 shipped at Pyramid Parts)
- Fork oil 10w ($9)
- An M10 bolt with 2 nuts - This will be used instead of an allen wrench 17mm
- A PVC pipe 1.5in (?) - Not pictured
- A ring spanner - turns out I didn't need it, but if you work on an early bike (81-83) it will make it a lot easier.
- Estimated time 4hrs for a newbie
- Medium set skills and tools needed - If you've done your engine oil change a few times, you should be ready for this... otherwise, start with the oil changes...
Steps
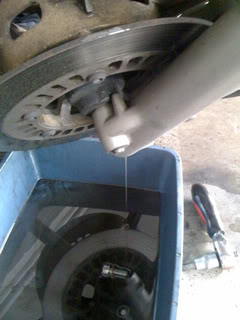
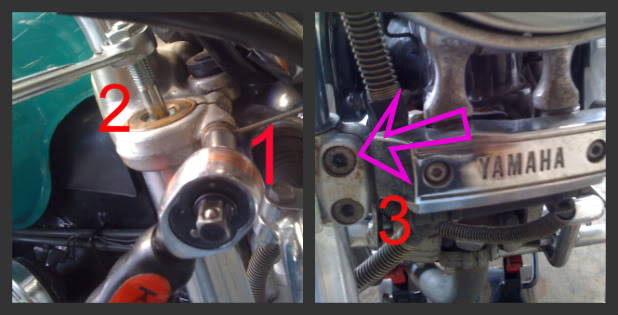
1) The very first step: Take off the bottom bolt.
Grab a buddy, and have him sit on the bike and to keep the bike level (no sidestand). Bike weight on both wheels
Remove both bottom bolts at each fork (Allen 8mm). It will get messy, have a container for the oil ready.
2) Now put the bike on the centerstand, and lift the front wheel with jackstands at the engine guards. Remove the brakes (hang them somewhere with a rope/wire), remove fender.
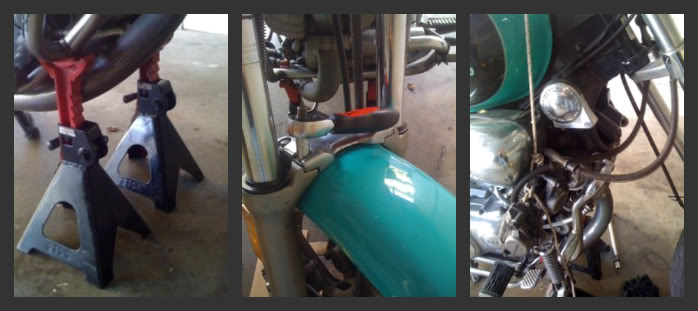
3) remove the wheel: Remove pinch bolt, Remove axle bolt (17mm socket - gentle tap with a mallet might be necessary) Remove speedometer sensor and spacer. Finally remove wheel.
Now on work on just one Fork at time
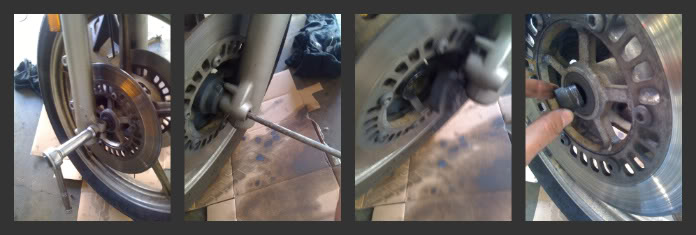
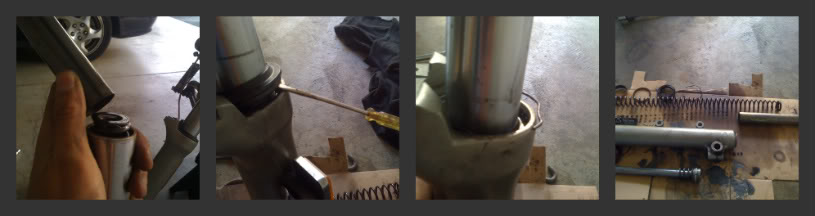
4) Loose the top clamp only. Then just loosen up (don't remove yet) the top cap with the M10 bolt with the 2 nuts upside down. Now loosen up the main clamp. Remove Fork.
5) Now with the fork out. Remove the top cap completely (Compress the fork a bit when the last threads are coming out, and slowly and carefully ease out the pressure when the cap is free - do it carefully and with your face away just in case, the spring is loaded)
6) Remove the dust seal, the wire clip securing the fork seal, and then just yank the bottom and upper fork to separate them. A few tough yanks might be necessary, but they will eventually separate. Note how the orientation of the fork seal and the bushing/washer. Carefully remove the damper rod with small spring from the inside of upper fork (they should be loose.)
Note that there is a spacer inside the bottom fork that fits on the lower end of the damper rod.
7) Clean everything with brake cleaner. Note the internal loose parts, don't lose anything (duh!)
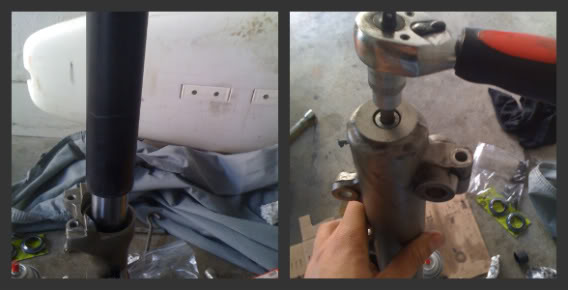
8) Put everything back together (no oil yet!): Damper rod with small spring inside upper fork, spacer at the bottom of damper rod, whole upper thing inside bottom fork, bottom bolt (You might be able to get a few turns in the bottom bolt, but not torque it yet...) here is the trick I did:
- Install the inner tube into the outer one. (Including, the internal parts -details above)
- Get a few turns in of the bottom bolt.
- Install the bushing/washer, and the fork seal - Seat the seal using the PVC tube and mallet - Replace securing wire ring - Install dust seal
- Replace the spring/washer/spacer and the top cap - Use the M10 bolt
- You should now have enough pressure to get the bottom bolt tighter to hold the oil. (you will get it even tighter in the last step)
9) Now remove the top cap (again), Pour the oil in now (13.4oz on the XV750 1995 - double check for other bikes)... And put top cap (again I know...)
By now you should have your fork with oil ready (except for final tightening of the bottom bolt and the top cap.)
10) Reinstall the fork. Once you got fork in place and main (lower) clamp torqued, proceed to torque the top cap, finally torque the top clamp.
11) Reinstall the wheel, brakes, and Fender.
12) Final step, you are not done just yet! Have your buddy again to jump on the bike and have it level. While the weight of the bike is on both wheels, get the bottom bolt tighter (It will get tighter, but finally it will turn... I find that's tight enough - FYI: There is a special tool to hold the damper rod, and ppl have made their own and even used a broom stick to hold it too while you get the bolt tight... your bike, your call)
Repeat for the other fork... Done!
