Vyrus wrote (
View
Post):
grazingazer wrote ( View
Post):
set to 15 mm-1.5 cm 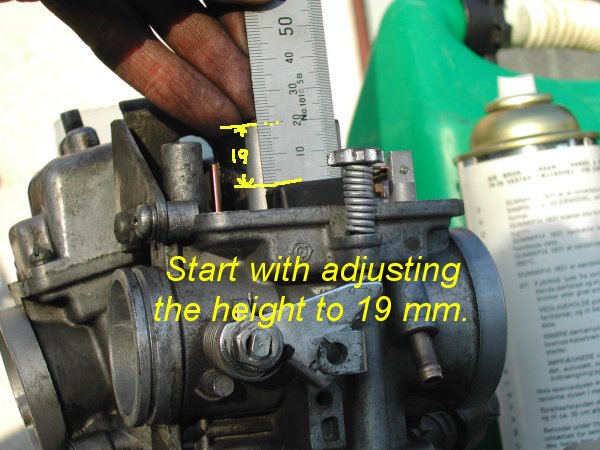 |
hahaha
GG, I was good with understanding this whole post until you chimed
in! j/k
15 mm from the mating surface to the top of the
float, or 19mm from the top of the float to the main jet boss, all
done while the carbs are off the bike and upside down on the table,
or workbench or whatever you use.
Is this exactly what you
are saying?? lol